Contents
Most garages start the same way: bare studs, one or two outlets, no heat, and a concrete floor that punishes your knees after an hour. Turning that space into a functional woodworking shop is absolutely achievable, but it takes more planning than most people expect. One Reddit builder in r/woodworking spent five months planning before touching a single tool, then another six months on the actual build. That ratio, more thought than action up front, is exactly the right approach.
Start With Space Planning
A standard single-car garage runs about 10′ x 20′, giving you 200 square feet to work with. That’s tight but workable. A two-car garage at 20′ x 20′ opens up real flexibility for dedicated zones.
Before buying anything, sketch a layout that accounts for four distinct areas:
- Assembly and workbench zone
- Primary stationary tool zone (table saw, miter saw)
- Lumber storage along one wall
- Finishing and sanding area near ventilation
Think in workflow triangles. Your table saw, workbench, and miter saw station should form a triangle where material flows naturally between them without backtracking. Wasted steps in a small shop add up fast over a long project day.
If you still need to park a car occasionally, plan for mobile tool bases on your larger equipment. Locking casters let a table saw slide against the wall whenever you need the floor space back.
Infrastructure Comes Before Tools
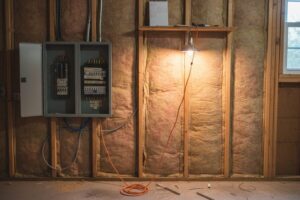
This is where most beginners underestimate the project. Converting a bare garage into a functional four-season workshop means addressing electrical, insulation, lighting, and flooring before a single board gets cut.
Electrical: Most woodworking tools need dedicated circuits. A table saw draws 15 to 20 amps, a dust collector pulls another 15 amps, and a shop vac adds more on top of that. Plan for at least four to six dedicated 20-amp circuits, plus one 240V circuit for larger tools.
Insulation and Heating: For year-round use, insulate walls to at least R-13 and the garage door to R-8 or better. In cold climates, a propane shop heater or mini-split handles temperature control without the carbon monoxide risks of vented combustion units in attached garages.
Flooring: Concrete is brutal for long sessions. Interlocking rubber tiles provide cushioning without trapping sawdust the way carpet would. Epoxy coatings look clean and resist moisture but don’t add any comfort underfoot.
Storage and Organization Systems
Wall space is your most valuable real estate in a small shop. A French cleat system, horizontal strips of 45-degree-cut plywood running across an entire wall, lets you reposition tool holders, shelves, and jigs without drilling new holes every time your workflow changes.
Pegboard works well for lightweight hand tools. For heavier items and a more modular setup, systems like Multiboard offer flexibility that pegboard simply can’t match. For lumber, vertical wall-mounted racks keep boards accessible and off the floor, while horizontal racks handle sheet goods. Either way, keep lumber away from exterior walls where humidity fluctuates most.
Dust Collection and Air Quality
Wood dust is the safety issue most beginners dismiss until they can taste it at the end of a session. Fine particles under 10 microns are the dangerous ones: invisible, slow to settle, and hard on your lungs over time. A single-stage dust collector handles chips and larger debris well, but for fine dust you’ll want to add a two-stage separator and an ambient air scrubber running continuously.
One documented nine-month garage build used reclaimed materials throughout, proving that budget-conscious builds are viable. Dust collection, though, is one area where cutting corners creates real health risk. A basic 1.5 HP single-stage collector connects to most stationary tools with 4-inch flex hose and gets the job done for most beginner setups.
For finishing work, staining or applying topcoats in an enclosed garage requires cross-ventilation at minimum. A dedicated spray area with an explosion-proof exhaust fan is the safer long-term solution, since solvent fumes are a fire hazard, not just a nuisance.
Permits, Insurance, and the Details People Skip
Adding circuits or modifying your garage structure typically requires a permit in most municipalities. Attached garages face stricter fire codes than detached ones because they share walls with living space. Check local codes before framing anything new or running new wire.
Homeowner’s insurance is another overlooked consideration. Adding thousands of dollars in tools and equipment changes your coverage needs, and if you plan to sell what you build, you may need a business rider on your policy. It’s a five-minute conversation with your insurer that’s worth having before anything goes wrong.
For a broader look at how woodworking shops come together at different budget levels, our full woodworking shop setup guide covers tool selection and room planning in more detail.
What to Budget for the Build
Infrastructure alone, including electrical upgrades, insulation, lighting, and flooring, can run $1,500 to $4,000 depending on your starting point. Add tools and storage, and a functional beginner shop typically lands between $2,000 and $6,000 total. Premium setups with quality stationary tools, dust collection, and climate control push past $10,000.
The budget path is real, though. Using reclaimed lumber for workbenches, buying tools used, and handling your own painting and flooring keeps costs manageable if you’re patient and willing to build the shop in stages.